How to Master Linocut Printmaking: Quick Step-by-Step Guide for Creative Success
How to Master Linocut Printmaking: Quick Step-by-Step Guide for Creative Success
Title: How to Master Linocut Printmaking: Quick Step-by-Step Guide for Creative Success
==================================================
Introduction: Quick overview of the craft and its appeal
Linocut is a fearless entry point into printmaking. You carve a design into linoleum, ink the surface, then press it on paper or fabric to create bold, high-contrast prints. The process is tactile and immediate, a rhythm that echoes woodcarving traditions and stamping practices across the continent. Think of Adinkra makers in Ghana preparing cloth with hand-carved stamps, or the geometric clarity of Ndebele mural work. Linocut thrives on the same principles, clean shapes, symbolic pattern, and strong storytelling.
Compared to loom-based weaving like kente or complex lost-wax bronze casting, linocut sets up fast and can scale from intimate cards to gallery editions. It is perfect for artists who want graphic punch, quick iterations, and the option to translate designs onto prints, totes, tees, or wall hangings.
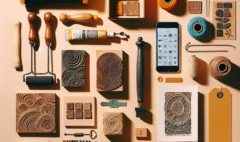
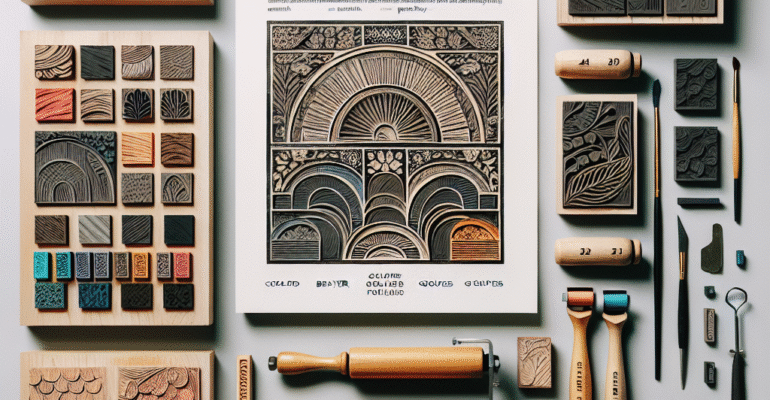
Materials and Tools You’ll Need
- Linoleum block, traditional or soft-cut
- Carving tools, V-gouge and U-gouge set, handle, bench hook, and cut-resistant glove
- Ink, water-based for easy cleanup or oil-based for rich blacks and durability
- Brayer, roller, inking plate or glass slab
- Paper or pre-washed fabric, plus scrap paper for proofing
- Baren or wooden spoon for hand printing, or a press if available
- Pencil, tracing paper or carbon paper, ruler, and masking tape for registration
- Cleaning supplies, mild soap for water inks or mineral spirits for oil inks
Step 1: Preparing Materials
Start with a clear, high-contrast design. Sketch directly on the lino with a soft pencil, or transfer it using tracing or carbon paper. Mirror the design, especially if you plan to include text, since the print will reverse.

Warm the block slightly with your hands or a low setting hair dryer. It softens the surface and gives your tools a smooth bite. Secure the block on a bench hook or non-slip mat. Plan your positive and negative areas, what you leave raised will print, what you carve away will stay light.
Step 2: Core Techniques or Methods
Carving is about control. Keep your guiding hand behind the blade, carve away from your body, and rotate the block as needed.
- Lines and textures. Use the V-gouge for crisp lines. The U-gouge clears broader areas. Alternate line widths to create vibrato and depth. Cross-hatching can give tone without muddying the image.
- Proof early and often. Roll a thin film of ink on the block, take a quick proof on scrap paper, then refine. Many strong linocuts emerge through three or four rounds of carve, proof, adjust.
- Registration. For multi-color or multi-block prints, tape paper corners on your inking plate to guide paper placement. Simple cardboard L-shapes work well and keep layers aligned.
A human story. In the 1960s and 70s at the Rorke’s Drift Art and Craft Centre in South Africa, John Muafangejo carved life into linoleum. His black and white prints carried the cadence of oral histories, cattle kraals, church life, and the pressures of apartheid. His tools were modest, his voice unmistakable. Muafangejo showed how a humble block could become a powerful amplifier of community memory.
Step 3: Applying the Craft or Creating the Product
Ink matters. Roll until the brayer whispers, not sloshes. You want a thin, even coat that looks like velvet. Two light passes are better than one heavy pass.
Place the paper carefully on the inked block. Burnish with a baren or the back of a spoon in overlapping circles for consistent pressure. Lift a corner to check coverage. Commit to the pull with a steady peel.
Printing on fabric. Use textile-friendly ink. Pre-wash fabric to remove sizing, then print on a firm, padded surface. Place a sheet of paper beneath to catch bleed-through.
Step 4: Finishing, Drying, or Setting
- Paper prints. Water-based inks dry within 15 to 60 minutes. Oil-based inks cure in 24 to 72 hours. Dry flat on a rack or line with clips to prevent smudges.
- Fabric prints. Allow to dry fully, then heat set according to the ink maker’s instructions, usually with an iron through baking paper

for several minutes.
- Editioning and signing. For fine art prints, number as 1/20, 2/20, and so on, sign and date in soft pencil beneath the image. Keep a clean artist proof for your archive.
- Care. Store prints in acid-free sleeves or interleave with archival tissue.
Creative Variations and Personalization
- Reduction printing. Carve and print the light color first. Carve more from the same block, print the next color on top. Repeat to build complex layers from a single block.
- Multi-block and jigsaw techniques. Separate colors onto different blocks, or cut one block into puzzle pieces and ink each part differently.
- Texture and collage. Chine-collé adds delicate papers to your print as you print it. You can also roll a second color with a stencil for quick gradients.
- Cultural motifs with respect. Explore Adinkra symbols, nsibidi scripts, Tuareg geometrics, or Swahili coastal arabesques. Research meanings to avoid misuse, then translate motifs into your own narrative.
Turning Your Craft Into a Small Business or Gift Project
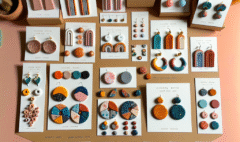
Linocut scales beautifully. Start with giftable items, greeting cards, notebooks, limited edition art prints, small framed works, tote bags, tea towels. Build themed sets, lunar phases, local birds, proverbs in your language, or city landmarks. Offer custom name seals or family crests for weddings and baby gifts.
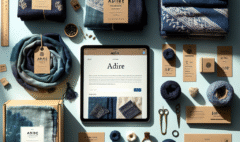
Create a clean visual identity. A simple logo, a consistent color palette, and a short artist statement that links your designs to place and memory will elevate your brand.
Tips for Pricing, Marketing, and Sharing Your Work
Pricing
- Track costs. Materials plus your time times an hourly rate plus overhead equals base price. Apply a fair margin that respects your skill.
- Tier your products. Open-edition cards at an accessible price. Limited-edition signed prints at a premium. Larger framed pieces for collectors.
- Protect value. Edition sizes should be honest and consistent. Record a certificate of authenticity for limited editions.

Marketing
- Show the process. Carving shavings, inking close-ups, first pulls. Short videos for Instagram Reels or TikTok attract attention.
- Tell stories. Share the origin of a motif, a proverb, a memory of a market day, or a family craft tradition. People buy meaning as much as they buy ink and paper.
- Local and digital. Join community markets, café walls, and bookshops. Online, use clear photos with natural light, concise product descriptions, and SEO-friendly keywords like Africa-inspired linocut print or hand-pulled relief print.
Sharing and growth
- Run weekend workshops at cultural centers or schools. Offer starter kits with a small block, basic tools, and safety tips.
- Collaborate with textile artists, photographers, and poets. A print becomes a story when placed in conversation with other forms.
Conclusion: Encouragement to Experiment and Enjoy the Creative Process
Linocut rewards courage and curiosity. Each cut is a decision, each pull a small revelation. From the crisp snap of a V-gouge to the quiet lift of the paper, the craft invites you to speak clearly and print boldly. Start small, iterate, and keep the best of each lesson on your studio wall. What story from your community will you carve next, and who needs to see it today?
Sources
- South African History Online, John Ndevasia Muafangejo biography and context, sahistory.org.za
- British Museum Collection Online, prints by John Muafangejo and related relief works, britishmuseum.org
- African Arts, Journal of the UCLA James S. Coleman African Studies Center, articles on Rorke’s Drift printmaking and contemporary African print practices, mitpressjournals.org
- Tate, Art Terms, Linocut definition and techniques, tate.org.uk
- Smithsonian National Museum of African Art, collection and essays on African printmaking and graphic arts, africa.si.edu